
What the hell week is this?
Before we start, please let me address my last post. I was frustrated and stressed. You maybe picked up on that. I don’t want to apologize so much, but I do want to ask for, I don’t know, your understanding, I guess? We’ve all hit walls in projects, right? I do really feel like the home decor/DIY blogs or Instas don’t always tell the truth about these walls. While the rest of us hit them at 200 mph and are lucky to live to tell the tale.
I am not an inexperienced home DIY-er. But I still get sucked into the whole “these people did this and it looked SO EASY” thing. Even at my advanced age. (I’m a Gen-X-er. Not super old. But not a Millenial with all their undying energy. Where the fuck do they get that?) Perhaps I am gullible. Or I overestimate my capabilities. (Ha! All. The. Time.) I am also super competitive and have HUGE perfectionist tendencies. (People who know me are nodding violently. And probably rolling their eyes.) So I quite frequently want to do the work myself to get it done right.
This project on this deadline has really taken it out of me. And it’s really made me aware that the DIY blogs that make this all look so easy are either run by cyborgs and their staff or they really are just shilling products. (Use a paint sprayer like ours and your project will be so easy!) I am re-thinking my own status as a shrewd person right now. I really thought they were for the most part sincere.
I just want to add before we get into updates on the room here that I am really appreciating those content creators who tell it like it is. I love Shavonda Gardner for this. She is always real about challenges she faced in DIY and what she will never do herself again. I also love Daniel Kanter for his honesty about how hard some projects turn out to be and I relate to how he always underestimates the time and hassle to do a project. I do feel like Susan and Will of House of Brinson also keep it real about timelines for projects—I wholeheartedly agree with them that slower renovations are more realistic and bring better results.
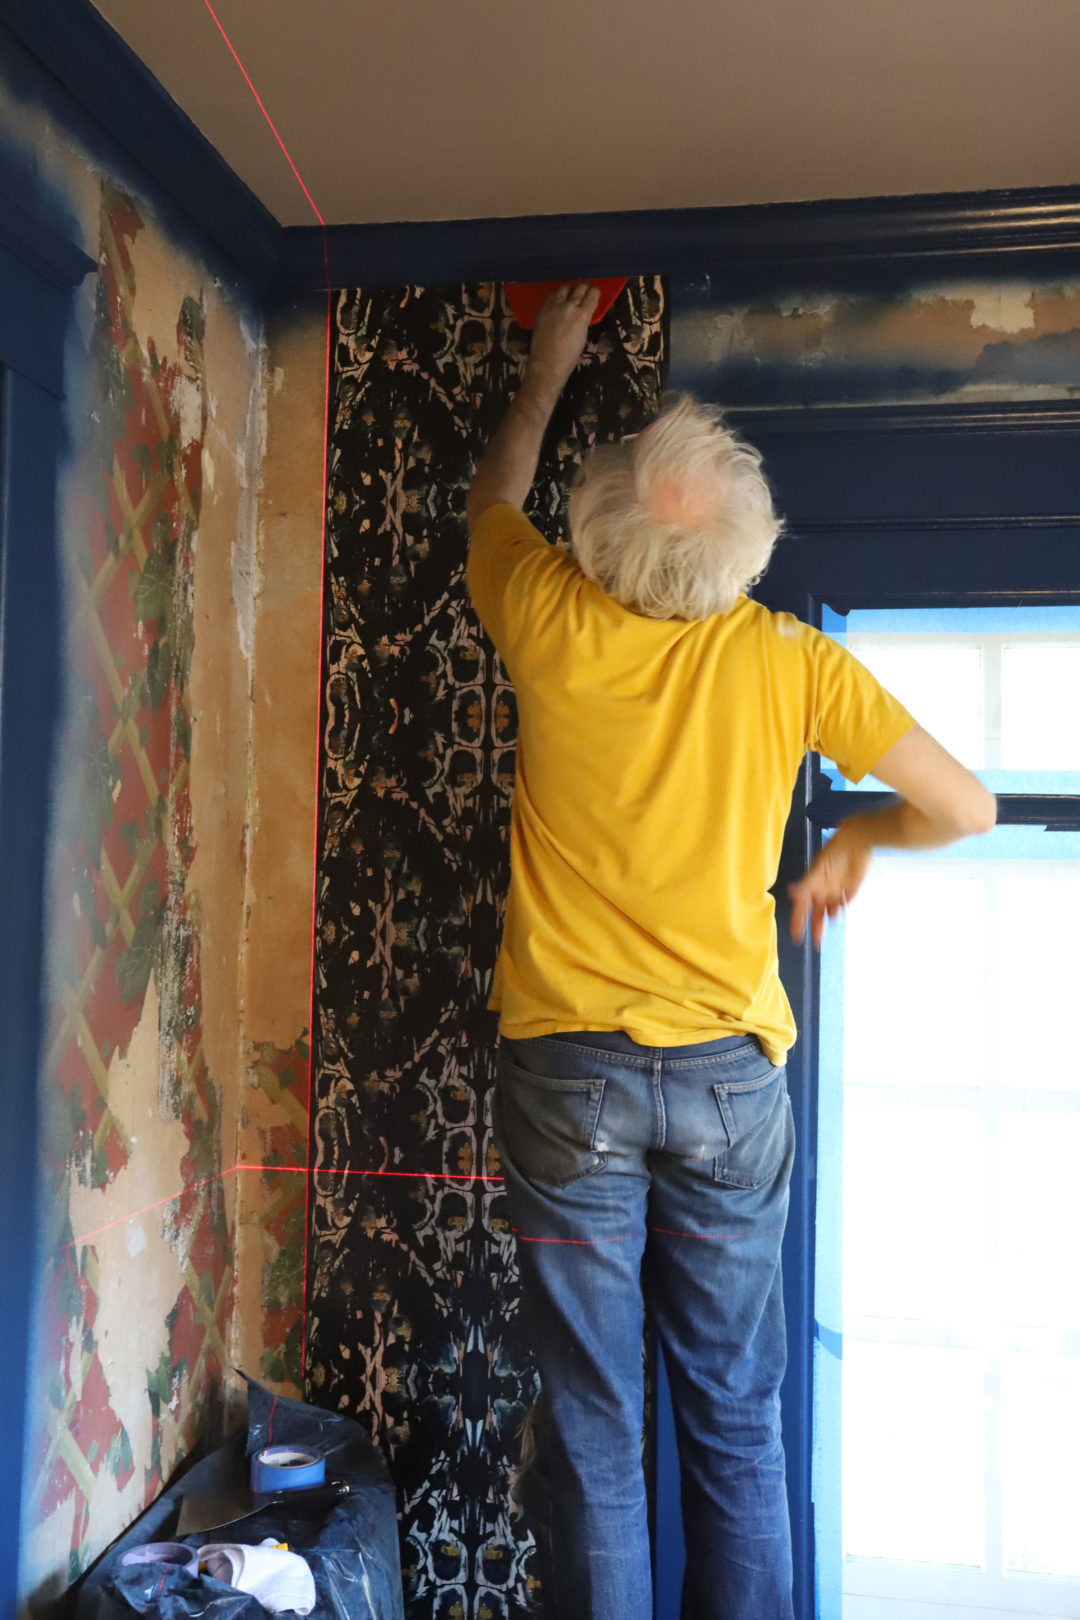
Let’s move on! We WALLPAPERED. And by that, I really mean: The Man of Action wallpapered. And he did so good! Especially since it was the first time either of us had tried this. I did the research, assembled all the necessary supplies, and I pasted the wall for him. But the Man did all the real work. I believe I already mentioned that I am a perfectionist. The Man is too, but not to the extent I am. For instance, I cannot tile things because I can’t let go of every last detail and lining up ALL THE THINGS. So the Man does the tiling and I do the grouting. That’s kind of how wallpapering went down too. I couldn’t do it.
Please excuse the late night photo. But that’s how we roll. Nothing gets done during the day around here. We’re punk rockers! We work all night! Just kidding, I’m just really bad at getting started on anything before 3pm.
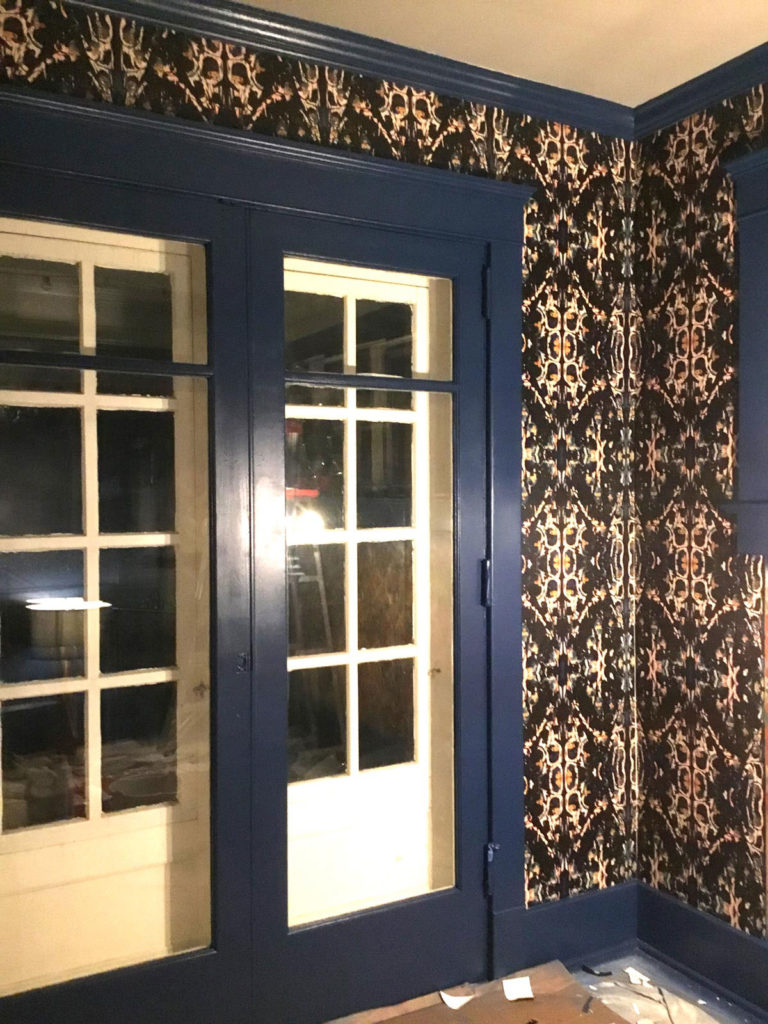
Just look at how great that wallpapering job is! That paper is everything. I love you, Siouxsie wallpaper from Anna Hayman! I also love you, Man of Action! Thank jeebus for you.
Wallpapering was challenging, but not like painting the wood trim. It only took us one 10-hour day to wallpaper. There were frustrations, of course. Like all that window and door trim the Man had to cut around. And all the really out of plumb, non-square 100-year-old walls. We found these resources helpful:
- Lauren Caron of Studio La Loc’s wallpapering guidelines. I want to stress how important it is to paint the wall a dark color before you apply a dark wallpaper. We did not do this and the first corner the Man papered was a GIANT challenge. I painted the next corner with the blue trim paint before he got over to that and things went so much smoother there.
- This Hygge & West video about how to paper around intricate trim.
Last piece of advice: USE A LASER LEVEL. Holy crap, that made things so much easier.
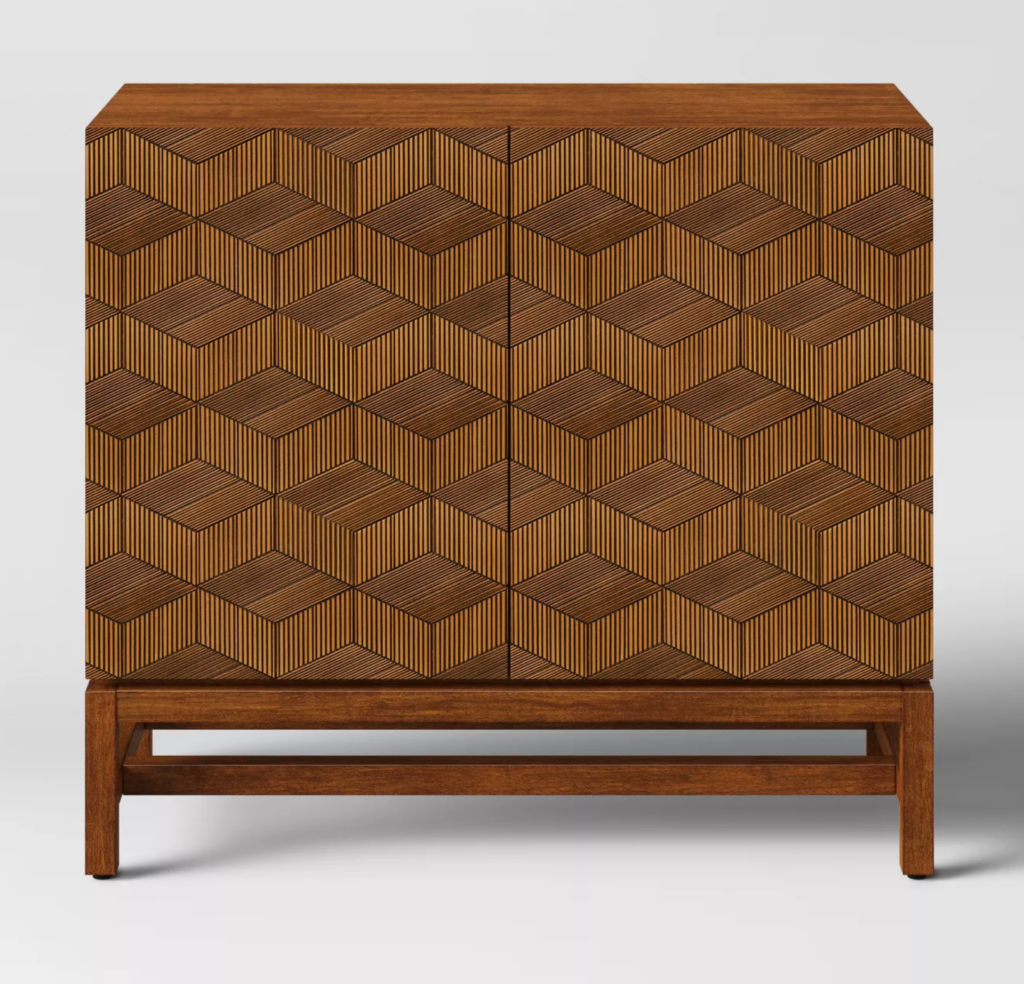
Also? In the last two days of decent weather here in Michigan, I took apart and painted the Target Tachuri cabinets I got to flank my new desk. I did use the paint sprayer on these—but OUTSIDE. Where I could paint and breathe at the same time.
Here’s the cabinet:
Here’s the yard painting (with bonus Man of Action!):
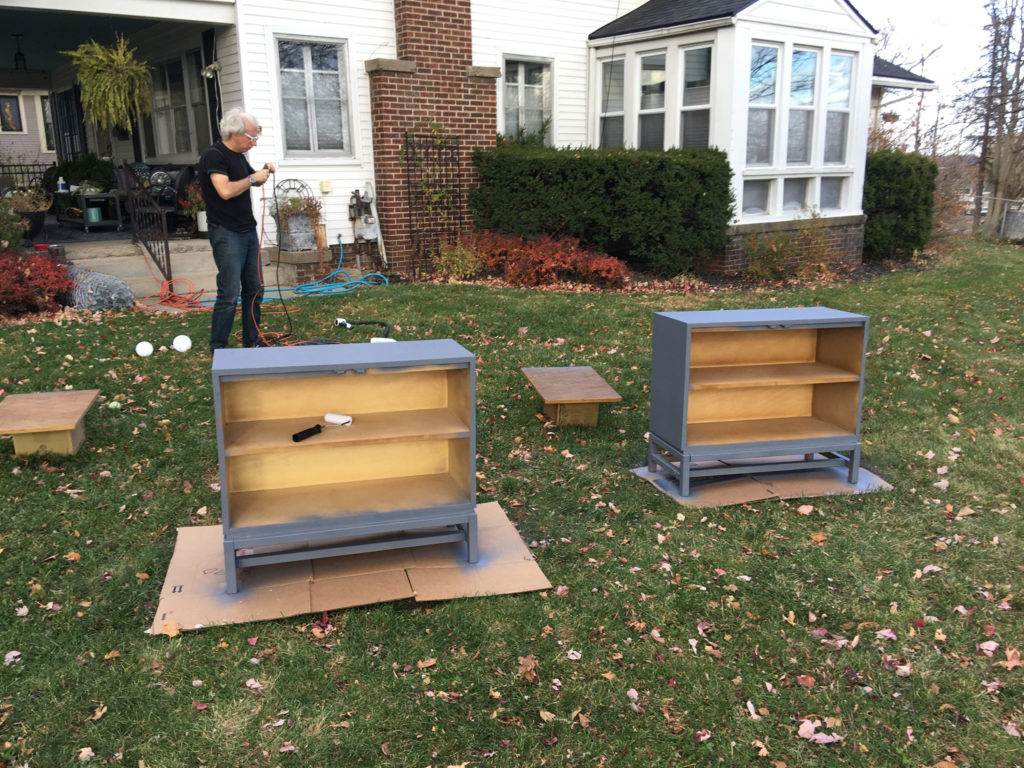
I deglossed the wood and veneer on these first. And here you see the Stix primer coat. I didn’t paint inside the cabinets. Mostly because the shelves do not come out. But also because it was overcast and about to rain and I DID NOT HAVE TIME. Also, too, paint takes a good four to six weeks to fully cure and I don’t want to wait that long to put things inside the cabinets. After the primer, I did two coats of Benjamin Moore Black to match the new desk. You’ll have to tune into the final ORC post to see them though.
Fun fact. See where the cabinet fronts are lying on boxes behind the cabinets? I should have put a drop cloth underneath them. I didn’t because I always paint furniture this way in the yard because the next time you mow the lawn the paint disappears. But oops, it’s autumn. (The second worst season of the year. I hate it. Fight me.) That grass is not growing and not getting cut again. So we have black spots in our front side yard for the winter. The Man was thrilled. Eh, I’m sure we’ll have six inches of snow soon to cover it all. (Winter. The worst season.)
Next post right after this will be the *almost* finished room. (I know I just ruined any suspense there, but I’m trying to lower your expectations. Just in case 2020 has not sucked all hope out of you by now.) See you soon!
